Proper insulation is crucial for maintaining a comfortable and energy-efficient home. Expertly installed insulation can significantly reduce energy bills, enhance indoor comfort, and contribute to a more sustainable environment. Here’s a comprehensive guide with tips and tricks to ensure your insulation installation is efficient and effective.
1. Understand the Basics of Insulation
Before starting, familiarize yourself with the different types of insulation and their uses. Common types include:
- Fiberglass Batts: Cost-effective and easy to handle, suitable for walls, ceilings, and floors.
- Spray Foam: Ideal for sealing gaps and providing high thermal resistance.
- Rigid Foam Boards: Excellent for exterior walls and roofing.
- Blown-in Insulation: Suitable for filling irregular spaces and cavities.
Understanding the R-value, which measures the insulation’s thermal resistance, is also vital. The higher the R-value, the better the insulation.
2. Assess Your Needs
Perform a thorough inspection of your home to identify areas needing insulation. Focus on:
- Attics: These are often the most significant sources of heat loss.
- Walls: Uninsulated walls can lead to noticeable temperature fluctuations.
- Floors Above Crawl Spaces or Basements: Proper insulation here can improve overall comfort.
- Windows and Doors: Ensure proper seals to prevent air leaks.
Consider hiring a professional energy auditor to assess your home’s insulation requirements.
3. Gather the Right Tools and Materials
Having the right tools ensures a smooth installation process. Essential tools include:
- A utility knife for cutting insulation.
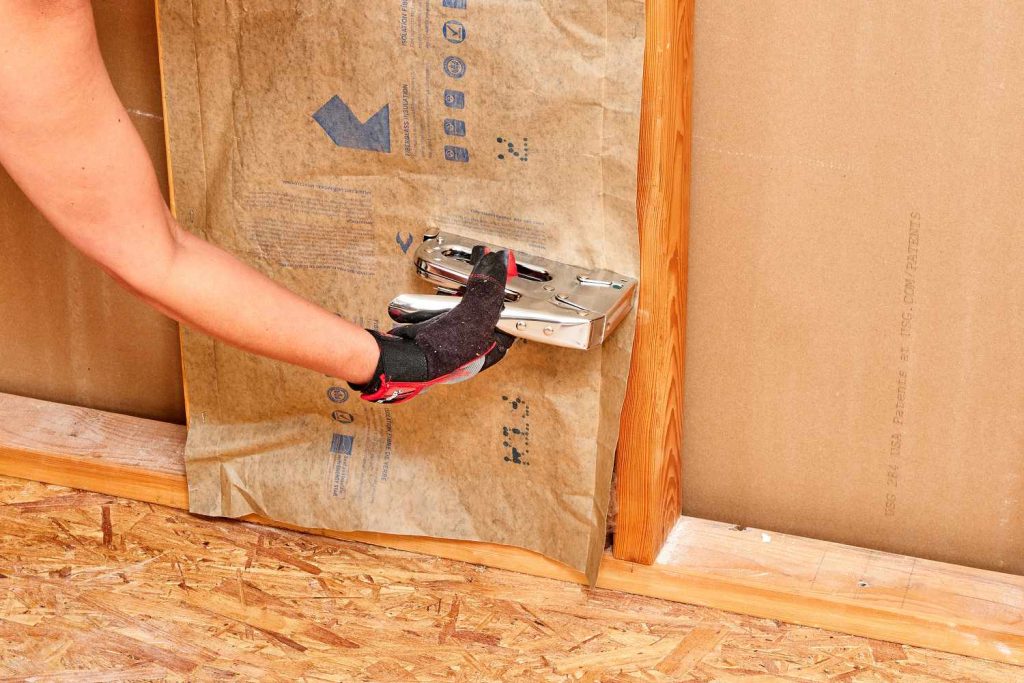
- A staple gun to secure batts.
- Safety gear like gloves, goggles, and masks to protect against fibers and chemicals.
- Measuring tape to ensure accurate cutting and fitting.
- A straightedge for precise cuts.
Ensure you purchase high-quality insulation material suitable for your home’s specific needs.
4. Prepare the Installation Area
Proper preparation ensures that the insulation is installed effectively:
- Clean the Space: Remove dust, debris, or existing damaged insulation.
- Seal Gaps and Cracks: Use caulking or spray foam to close any air leaks before adding insulation.
- Install Vapor Barriers: In moisture-prone areas, vapor barriers can prevent mold and dampness.
- Ensure Accessibility: Make sure the area is clear and easily accessible for installation.
5. Measure and Cut with Precision
Accurate measurements are key to ensuring the insulation fits snugly:
- Measure the area to determine the amount of insulation needed.
- Cut batts or foam boards slightly larger than the space to ensure a tight fit, as compression can reduce effectiveness.
- Use a straightedge to guide your utility knife for clean and precise cuts.
6. Install Insulation Correctly
Each type of insulation requires a specific installation approach:
- Fiberglass Batts: Fit batts snugly between studs or joists without compressing them. Use a staple gun to secure the kraft paper facing to the wood frame.
- Spray Foam: Follow the manufacturer’s instructions. Apply foam evenly to fill gaps and cavities, and avoid over-spraying.
- Rigid Foam Boards: Use adhesive to attach boards to surfaces and seal edges with tape for an airtight fit.
- Blown-in Insulation: Use a blower machine to distribute insulation evenly across the attic or walls.
7. Focus on Safety
Insulation materials, especially fiberglass, can cause irritation if mishandled. Always prioritize safety:
- Wear gloves, long sleeves, and goggles to protect your skin and eyes.
- Use a mask or respirator to avoid inhaling fine particles.
- Work in a well-ventilated area, especially when handling spray foam insulation.
8. Address Common Challenges
Insulation installation can present unique challenges. Here’s how to handle some common issues:
- Irregular Spaces: Use blown-in insulation or cut batts into smaller pieces to fit odd shapes.
- Obstructions like Pipes and Wires: Cut insulation around these obstructions or split batts to wrap around them.
- Moisture Issues: Address leaks or dampness before insulating. Mold and mildew can compromise insulation effectiveness.
9. Pay Attention to Sealing and Gaps
Proper sealing is as important as the insulation itself:
- Seal all joints and edges of rigid foam boards with foil tape.
- For attics, ensure insulation covers gaps around light fixtures and vents without obstructing airflow.
- Install weather stripping on doors and windows to complement your insulation efforts.
10. Maintain Ventilation
While insulation helps retain heat, proper ventilation ensures that moisture and heat buildup don’t compromise the system. For attics:
- Install soffit vents to allow air circulation.
- Use baffles to prevent insulation from blocking vents.
11. Double-Check for Quality
Inspect your work after installation to ensure it’s up to standard:
- Check for gaps or compressed insulation, which can reduce performance.
- Ensure vapor barriers are properly placed, facing the warm side of the space.
- Verify that the insulation thickness matches the recommended R-value for your region.
12. Consider Professional Assistance
While DIY installation can save money, hiring professionals ensures top-quality results, especially for complex areas like spray foam or blown-in insulation. Professionals can also help you avoid common mistakes that might reduce insulation efficiency.
13. Monitor and Maintain
Once installed, proper maintenance ensures long-term efficiency:
- Regularly inspect insulation for signs of wear, moisture, or pest damage.
- Replenish blown-in insulation if it settles over time.
- Replace damaged or compressed batts promptly.
14. Take Advantage of Tax Incentives
Many regions offer tax incentives or rebates for energy-efficient upgrades like insulation installation. Check local government programs to maximize your savings.
Final Thoughts
Expertly insulation installers in Wellington can significantly enhance your home’s energy efficiency, comfort, and value. By following these tips and tricks, you can ensure a professional-quality installation, whether you’re tackling the project yourself or working with professionals. Proper planning, attention to detail, and ongoing maintenance will help you reap the benefits of a well-insulated home for years to come.


